Showing posts with label South Indian. Show all posts

Tuesday, May 1, 2012

Semiya Kesari - सेमिया केसरी (Vermicelli Pudding) - April Blog Hop

Hello Friends,


Here is my late entry for April Blog Hop. Another apology to Radhika and Gayatri.


Gayatri has this amazing collection of recipes. But, I specially wanted to try this one as I had created pudding out of semiya, but never a kesari, so it intrigued me and I have to say it didn't disappoint :)


Semiya Kesari - सेमिया केसरी (Vermicelli Pudding)

Ingredients
Semiya (Vermicelli) - 1 cup
Milk (I used Skim) - 2 cups
Sugar - 3/4 cup
Ghee - 1/3 cup 
Saffron - a couple of strands
Saffron Food Color - 2 pinches (optional)
Cardamom Powder - 1/2 tsp
Broken Cashew Nuts - 1 tbsp
Golden Raisins - 1 tsbp
Preparation
  • Lightly roast semiya in about 1 tbsp of ghee. Keep it aside.
  • In 2 tsp ghee, fry raisins till they are plump and cashew nuts till they are nice and golden (separately).
  • Soak saffron in a tbsp of warm milk.
  • Boil milk and add vermicelli to it and mix well.
  • Once milk is all absorbed, add sugar and cardamom powder to it.
  • When sugar is all melt, add all the rest of the ingredients and mix well.
  • Cook for another 2-3 minutes (mixing frequently).
  • Serve it warm.

Serving
Served it as dessert. I always serve warm as that is how we prefer in our house.


Do check what other blog hoppers made for April Blog Hop.


That's all for now. Take care till next post.

Monday, April 30, 2012

Til - Moongfali Chutney - तिल मूंगफली chutney (Sesame Peanut Chutney) for March Blog Hop

Hello Everyone,

I am trying to maintain the continuity. Here is a really late post for the March Blog Hop. Obviously due to this delay I have to apologize to Radhika, organizer of Blog Hops and Nisha, with whom I was paired in March.

Now that apologizes are made and hopefully accepted, here is the recipe I chose from Nisha's blog. I had too many choices, but this chutney caught my eye as I was looking for a new and easy chutney recipe for the idlis I was planning over that weekend.

Nisha, thanks dear, even my older one who is usually very picky with condiments, liked this chutney :)

Til - Moongfali Chutney - तिल मूंगफली chutney (Sesame Peanut Chutney)

Ingredients
Til (White Sesame Seeds) - 1/2 cup
Moongfali (Peanuts) - 1/3 cup
Coconut - 1/4 cup
Tamarind - size of a quarter (one rupee coin)
Dry Red Chilies - 3-4 (per your taste)
Garlic - 4-6 cloves (per your liking)
Salt - per your taste
Oil - 1 tbsp
Water - 1/2 cup (increase or decrease depending on how runny or thick you want your chutney)
For Tempering
Oil - 1 tsp
Mustard Seeds - 1 tsp
Preparation
  • Dry Roast Sesame seeds, Peanuts and Coconut till they are golden brown (do not over roast).
  • Take a non stick pan and add oil to it.
  • Once oil is hot, add tamarind, dry red chilies and garlic.
  • Fry till garlic is nicely roasted and golden brown.
  • Add all the ingredients except for tempering (including water) in a mixer/blender and grind to a coarse to smooth paste (as you like, I preferred it not very smooth).
  • Heat oil in a small pan and once it is hot, add mustard seeds and let them sizzle.
  • Immediately add it to the chutney and serve.

Serving
I served it with idlis and even with my yogurt rice. So, feel free to serve in in anyway you like. I felt that this was a great spread for sandwiches and rolls as well, if you like that taste.


This also goes to MLLA # 47 event brainchild of Susan.
That's all for now. Take care till next post.

Monday, January 16, 2012

Cucumber Dosa - खीरा दोसा (Cucumber Crepes)

Hello Friends,


Isn't that name intriguing. I know for some of you it is probably a regular thing, but for me, nuh-uh !!! I loved the fact that it had my favorite cucumber and yogurt and it is as simple as that. 


We loved the taste, texture and everything about it. I am so frequently going to make it now as it is so simple to make. Not, a lot of things to remember. Thanks Kadhyaa Blog for such a wonderful recipe.


Without further ado, here is the recipe.


Cucumber Dosa - खीरा दोसा (Cucumber Crepes)
Ingredients
Rice - 1.5 cups rice
Cucumber - 2 medium ones, peeled and chopped  about 1.5-2 cups
Yogurt - 1/2 cup, preferably sour
Coconut - 1/2 cup, grated
Fenugreek Seeds - 1/2 tsp
Salt - per taste
Oil - to cook dosa/crepes
Preparation

  • Wash and Soak rice for about 8 hours or preferably overnight.
  • Drain it and grind it with the rest of the ingredients (of course except oil).
  • Now, heat a non-stick griddle, brush a little oil.
  • Once it is piping hot, add about 1/4 cup dosa batter (increase or decrease based on your griddle size) and spread in a thin circle.
  • Spray little oil or ghee to cook it till golden on both sides.

Serving
Serve it with your favorite chutney or sambar or a combo of both. Enjoy !!!


I am submitting this to Veggie/Fruit A Month - Cucumber event hosted by Richa and started by me.
That's all for now. Take care till next post.

Thursday, January 12, 2012

Veggie Bonda for Blog Hop

Hello Friends,


With new year, our Blog Hop has changed a little. Now we will be doing it just once a month and the same pair will cook from each other's blog than a difficult schedule to remember. Thanks Radhika for all the effort in making these changes and maintaining it. Kudos Girl !!! Please do check what everyone is cooking.


This month, I am paired with Neetz of Kitchen Express. She has a wonderful blog with too many delicacies to choose from. But, when I was choosing, I picked these Veggie Bonda, just because they looks delicious and I had some leftover dosa batter handy :) Thanks Neetz for this delicious recipe.


What I changed was instead of deep frying them, I made them like paniyaramas using my pan, in order to try to eat little healthier.


Veggie Bonda Paniyaram Style (Crepe Batter Fritters)


Ingredients
Dosa Batter -  4 cups
Rice Flour  -  2 tbsp
Carrot - 1 cup, grated
Onion - 1 cup, medium sliced
Curry leaves - 3 twig leaves
Cumin Seeds - 2 tsp
Salt - as per taste
Preparation

  • Very simple, mix all the ingredients together.
  • Heat Oil in a pan (enough to deep fry) or heat up a paniyaram pan and spray with a little bit of oil.
  • If using deep frying method, take a spoonful and drop them in hot oil slowly and fry till golden brown and drain them on paper.
  • If using paniyaram pan, pour a spoonful (depending on the pan size) in each hole and let it cook on both sides till golden brown.

Serving
Serve hot with your favorite chutney. We enjoyed them a lot.


That's all for now. Take care till next post.
Monday, January 2, 2012

Corn Meal Rava Dosa for Blog Hop

Hello Friends,


Again late for my Blog Hop entry this week. I was paired with Anu of Anu's Healthy Kitchen. Please do check what other bloggers cooked for this one by clicking on the link of Blog Hop.


Wanted to pick something different and my eyes spotted this. I am like wait, a dosa out of corn, that sounds interested. And, so here I am with her Corn Meal Rava Dosa.


For those who do not know, dosa is a crispy crepe that is made usually with rice and lentil batter. A very gluten free recipe for someone who cannot enjoy usual crepes.


I couldn't believe how normal or regular dosa like it came. My son couldn't tell the difference and neither could I. Same crispiness as if you used rice in it. So, without further ado, here is the recipe.


Corn Meal Rava Dosa
Ingredients
Urad Dal (skinned split black gram) - 1 cup
Idli Rava (cream of rice) - 1 cup
Corn Meal (white or yellow) - 2 cups
Eno Salt - 1 tsp
Baking Soda - 1/2 tsp
Salt - for taste
Oil - for cooking dosas (and not to be mixed in the batter)
Preparation

  • Soak Urad Dal for 3-4 hours and grind it to a smooth paste.
  • Add idli rava and corn meal to it, mix well. 
  • Add water to bring it to dosa or pancake batter consistency.
  • Let it sit overnight or for about 8 hours before you use it.
  • Now, add the rest of the ingredients (eno, salt and baking soda) and mix well.
  • Add more water, if needed.
  • Heat a non stick pan.
  • Take a spoonful or 2 of the batter, pour it on the tawa and spread it in a circle till it is nice and thin.
  • Sprinkle or spray little oil on the sides and on the dosa itself.
  • Let it cook on both sides for about 30 seconds or till golden brown or the texture you prefer.
  • Enjoy !!!

Serving
Serve it with any sambar or chutneys you like. Make them crispy or soft per you liking.


That's all for now. Take care till next post.

Wednesday, December 21, 2011

Peanuts Chutney for Blog Hop

Hello Friends,


I know I know, I am a week late to post this recipe. Somehow these days the schedules are slipping from under me and I am not too happy about it, but there is very little I can do. I apologize to Radhika and Dhivya both.


Please check this edition of Blog Hop and enjoy all the delicacies :)


This was I was paired with Dhivya and I found this delicious yet simple recipe pf Peanuts Chutney that went perfectly with the paniyaramas I was making over the weekend. So, I just grabbed the opportunity and made it. 


Without further write-up, here is the recipe.


Peanuts Chutney

Ingredients
Peanuts - 1/2 cup, dry roasted
Onion - 1 big one, sliced
Tamarind - lemon sized ball, soaked in warm water for 10-15 min.
Red Chilies - 3-4, based on your taste
Currey Leaves - a spring
Cumin Seeds - 1 tsp
Coriander Seeds - 1 tsp
Oil - 1 tbsp
Salt - per your taste
Preparation

  • Take a non-stick pan and add oil.
  • Once hot, add curry leaves and onion to it
  • Fry onion till golden and it is cooked.
  • Add everything else to it except for tamarind and peanuts and fry for another 2 min.
  • Take it off the heat.
  • Now, extract juice from tamarind, about 1/2 cup and add it to the onion mix with roasted peanuts.
  • Grind them all with another 1/2 cup water. Decide the consistency depending on your taste.
  • It is ready to be dipped into :)

Serving
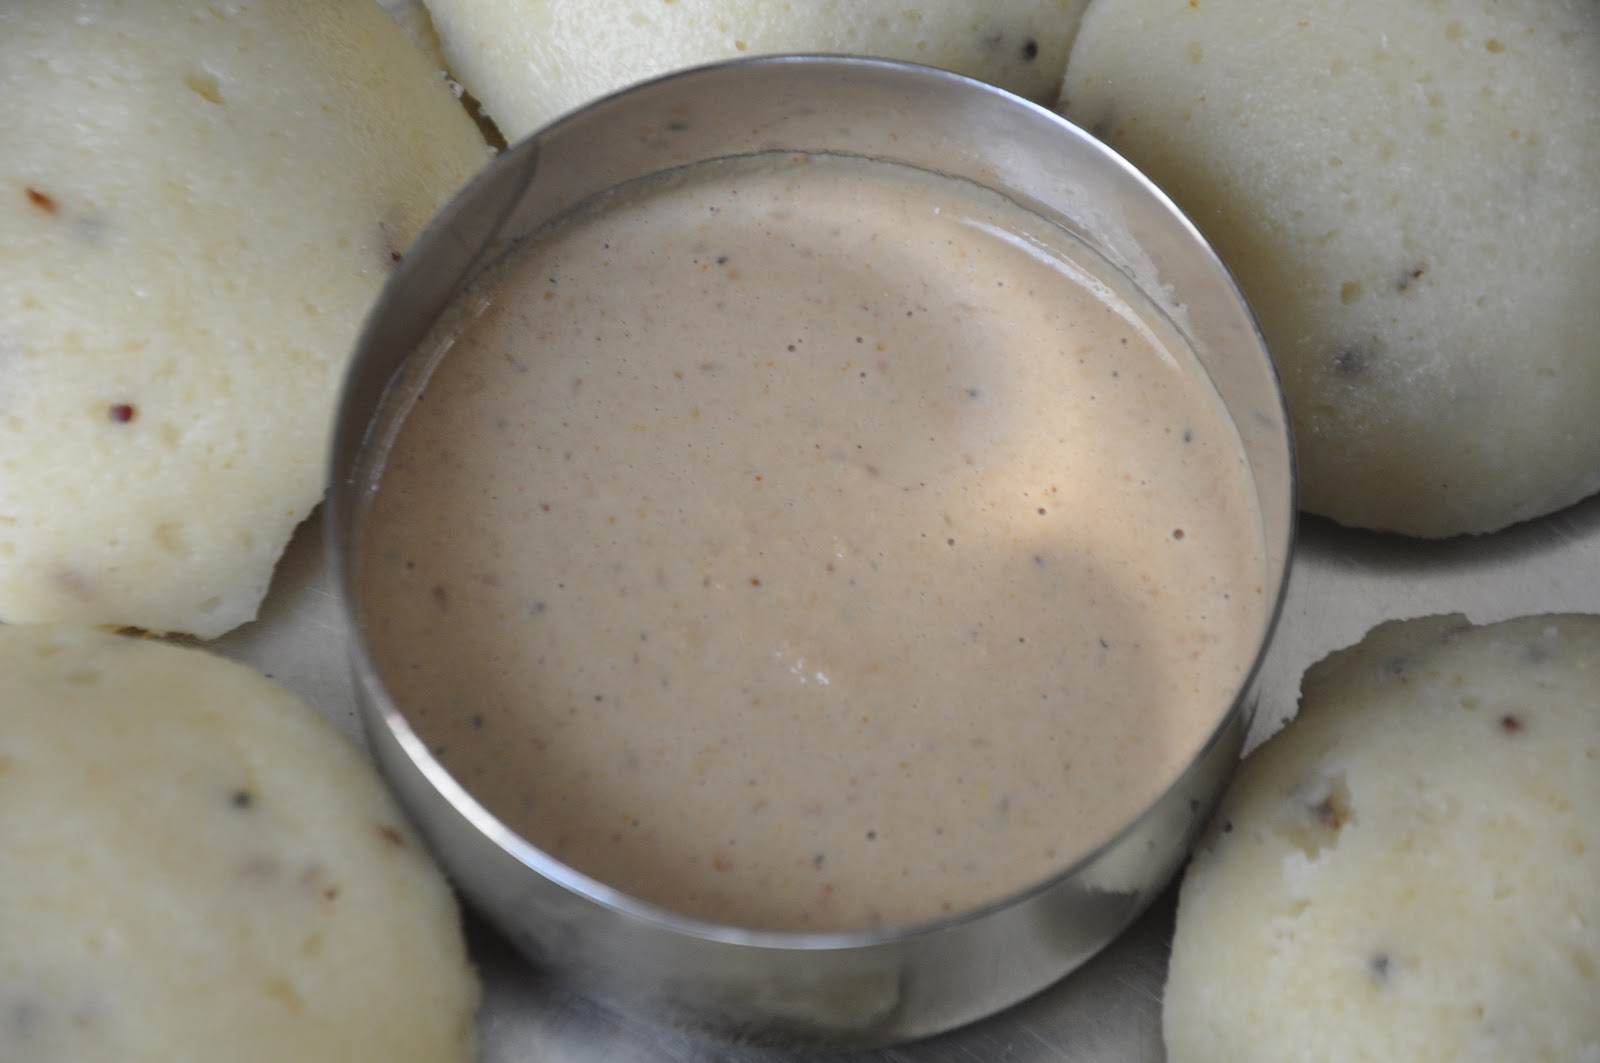
As you can see from the picture, I served it with paniyaram (a slightly different version of these) that I made and also some uttapams I tried later.


That's all for now. Take care till next post.

Friday, December 2, 2011

Shimla Mirch Ka Salan - शिमला मिर्च का सालन (Capsicums in Spicy Peanut Gravy)

Hello Friends,


Another week and another wonderful Blog Hop, brainchild of Radhika. 


This week, I was paired with a wonderful fellow blogger Veena. She had just too many delicious South Indian recipes, of course along with other delicacies. I was browsing her blog to chose my recipe and guess what I saw Mirch ka Salan. First, I thought, great, mirch ka salan and then I saw that she actually used shimla m,irch (capsicum) instead of hari mirch (jalapeno), which intrigued me even more and there I had my candidate for the blog hop.


So, further ado, here is the recipe for you.


Shimla Mirch Ka Salan - शिमला मिर्च का सालन (Capsicums in Spicy Peanut Gravy)
Ingredients
Shimla Mirch (Capsicum) - 3 big ones, cut into big cubes or long strips, whichever you like
Peanuts - 1/4 cup
White Sesame - 2 tbsp
Cumin Seeds - 2 tsp
Oil - 1 tsbp (to saute capsicum)
Salt - as per taste
For Ground Paste
Onion - 1 big one
Tomato - 3 medium ones
Ginger - 1 inch piece
Garlic - 3-4 big cloves
Coconut - 2 tbsp
For Dry Masala
Turmeric Powder - 1 tsp
Red Chili Powder - 1 tsp (increase or decrease based on your taste)
Coriander Powder - 1 tsp
Cumin Powder - 1 tsp
For Tadka
Mustard Seeds - 1 tsp
Methi dana (Fenugreek Seeds) - 1/2 tsp
Kalunji (Nigella Seeds) - 1 tsp
Oil - 1 tsbp
Preparation

  • Firstly, soak tamarind in warm/hot water about 1/4 cup for 10-15 min and then get the pulp out of it (about 2-3 tbsp)
  • Then, dry roast peanuts, sesame and cumin (not the tadka one) and grind them to coarse powder when cooled down a bit.
  • Now, grind everything under masala paste section with no added water.
  • Take a non-stick pan (deep one as the gravy on cooking tends to splatter).
  • Take 1 tbsp of oil in it and when it is hot, add mustard, fenugreek and cumin seeds.
  • Once they start spluttering, add ground paste to it and cook till all rawness is gone and nice aroma comes from it.
  • While that is cooking, take another non-stick pan and add oil to it.
  • Add capsicum and sprinkle little salt and saute  them for 3-4 minutes. Keep it aside.
  • Once gravy is cooked, add ground masala mix (peanut, sesame and cumin) along with other dry masalas and salt.
  • Let it cook for another 2 min.
  • Now, add tamarind pulp along with 1 cup water.
  • Cook the gravy covered (as it will splatter) for about 5 min. on medium heat.
  • Add sauteed capsicum and cook another 3 min. or till gravy thickens a little.

Serving
I served it both with warm rice and rotis. It was equally good. You could taste of course all the spice, but especially the peanutty goodiness, which I love in my curries :)


Please do check what other blog hoppers are cooking.

That's all for now. Take care till next post.
Monday, November 28, 2011

Chakkarai/Sweet Pongal for Blog Hop

Hello Friends,


I don't know where to start. These last couple of weeks or shall I say months have been crazy busy. So, many things happening (nothing bad). Like I was telling this friend of mine, it is an action-packed days, full-to-busy from morning 4:30 am till 10 pm (before I crash in bed).


I guess I am also going through that blogger block or whatever it is called where I don't know what to do or what to post. And, again, I am also not cooking very new and uncooked dishes, so that is also one of the reasons.


Anyways, I want to apologize here to all my readers and my blogger friends whom I follow religiously as I did not get to post or visit anyone in last month or so.


I love Blog Hop event, but unfortunately, could not post my dish on time as I should have. Sorry Saras about it. I was paired with wonderful Saras. While I was going through her blog, this dish caught my eye right away and I knew what to make. I always wanted to try Chakkarai/Sweet Pongal as I love it as a prasadam. For my non South Indian friends who have not heard of this before, let me explain it. It is cooked rice/moong dal mix in milk and then sweetened with Jaggery and loaded with ghee. Have I tempted you enough? :)


Here is the delicious recipe.


Chakkarai/Sweet Pongal
Ingredients
Rice - 1 cup
Moong Dal - 1/3 cup
Milk - 1.5 cups
Water - 2.5 cups
Powdered Jaggery - 2 cups or to taste
Green Cardamom Powder - 1 tsp
Cashews - pieces, 2 tbsp
Ghee (Clarified Butter) - 3 tbsps
Preparation

  • Pressure Cook Rice & Dal till almost mushy with Milk and Water mix (as mentioned above).'
  • Meanwhile, heat jaggery with about 1/4 cup water till it melts nicely.
  • Pour Jaggery water and 2 tbsp ghee in cooked rice/dal mix (add about 1/4 cup water, if needed).
  • Add cardamom powder and mix well.
  • In a small non-stick pan, fry cashew pieces to golden brown in 1 tbsp ghee.
  • Mix cashews well with the sweet pongal and take it off the heat.

Serving
This is usually made as an offering to God, but we enjoyed it as a delicious dessert. If I were you, I will serve it warm :)


That's all for now. Hope to be back on track. Take care till next post.

Wednesday, November 2, 2011

Moongfali Chawal - मूंगफली चावल (Peanut Rice) for Blog Hop

Hello Friends,


Another week of Blog Hop, love it, get to try different blogs and different recipes. Please check out what all this is about.


This week, I am paired with Priya Vassu of Enveetu Kitchen. A wonderful blogger and a great space she has. As, I always say, when I cook from someone's blog, I like to try their specialties, so, I picked a south Indian variety of rice preparation. I loved such mixed and quick rice preparations.

We enjoyed it and hope you do too !!!

Moongfali Chawal - मूंगफली चावल (Peanut Rice)
Ingredients
Rice - 2 cups, cooked
Peanuts - 1.5 cup, skinned and roasted (I used pre-roasted and lightly salted peanuts)

Grated Coconut - 1/4 Cup

Sesame seeds - 2 tbsp (you can increase the quantity or omit based on your preference)
Dry Red Chilies - 8-10

Turmeric Powder - 1/2 tsp, just for color
Salt to taste
Oil - 2 tbsp
For Seasoning
Mustard seeds - 1 tsp
Gram Dal - 1 tsp
Curry leaves a few - I skipped this as I didn't have any.

Preparation
  • Cook rice such  that the rice grains are nice and fluffy.
  • Powder roasted peanuts coarsely.
  • Take 1 tsp oil in a non stick pan.
  • Roast coconut and red chilies and powder them.
  • Dry roast sesame seeds. Now, original recipe asked to powder it. But, I preferred not to, so, it is your preference.
  • Heat rest of the oil in a pan. 
  • Add seasoning and let it splutter.
  • Now, add rice, turmeric powder and all dry powders along with salt.
  • Mix well and take it off the heat.
Serving
Serve it with some pickle or rasam/dahi as you prefer.


Please do check what other blog hoppers are cooking.


That's all for now. Take care till next post.

Wednesday, October 12, 2011

Beans Paruppu Usili (Green Beans and Chana Dal Curry) - for Blog Hop

Hello Friends,


Another week of Blog Hop, love it, get to try different blogs and different recipes. Please check out what all this is about.


This got I am paried with wonderful Laxmi of Samyal Diary. A great blog and wonderful collection of recipes. I want to try many, but I wanted to go authentic and so opted for this delicacy, which I had eaten, but never prepared at home. This is the famous dish of Tamil Cuisine called Beans Paruppu Usili.


When I was browsing through her recipes, I knew right away that this is what I wanted to try. A very easy to make recipe and tastes wonderful. I loved the ground dal and beans combination very much.


Beans Paruppu Usili (Green Beans and Chana Dal Curry)
Ingredients
Green Beans - 2 cups, chopped to desired shapre, smaller the better
Onion - 1/2 cup, finely chopped
Chana Dal (Split Chickpea Bean) - 1/4 cup
Dry Red Chilies - 3-4 (depending on your preference of heat)
Cumin - 1 tsp
Mustard Seeds - 1 tsp
Curry Leaves - a few leaves
Oil - 1 tsp
Preparation
  • Wash, chop and prepare green beans.
  • Wash and soak chana dal for 1 hour.
  • After an hour, grind drained chana dal with dry red chili and cumin to a coarse paste by adding very little water.
  • Take a non stick pan and add oil.
  • Once oil is hot, add mustard seeds and curry leaves and let seeds splutter.
  • Add onion and let them fry till light brown.
  • Add ground paste and fry for about 2 min.
  • Add green beans and salt and mix well.
  • Cover and cook till beans are done.
Serving
Serve it with roti, like I did or the traditional side of rice.


Please do check what other blog hoppers are cooking.


That's all for now. Take care till next post.

Tuesday, August 23, 2011

Nariyal Ki Khichdi - नारियल की खिचड़ी (Coconut Rice and Lentil Preparation) from Deepthi

Hello Friends,


Today, I am here with a wonderful new dish that I had never tried and loved making and eating it both. It is called Nariyal Ki Khichdi - नारियल की खिचड़ी (Coconut Rice and Lentil Preparation). I saw it in Deepthi's blog and wanted to try it out right away.
If you like the taste and flavor of coconut milk and shredded coconut, I can guarantee that you will love this recipe. It is a one pot meal if you add some veggies to it as well. I guess, this was the first time and next time I will experiment more with it. I cooked khichdi in rice cooker and didn't like the dry version much, but I am thinking cooking it in regular cooked and adding more liquid should do the trick, so that is for next time :)


I served it with  Zucchini Mor Kuzhambu - Zuchhini की कढ़ी (Zucchini in yogurt gravy) and it was a match made in heaven :)

Please click on the recipe link to check the wonderful recipe and mouth watering pic.

his goes to Bookmarked Recipes - Every Tuesday (Volume 55) event of Aipi and Mine.


Friends, a small request, PLEASE READ RULES of this bookmarked event properly. We have changed rules a bit and please go through them. From now on, re-writing someone's recipe is not allowed and only a link needs to be posted in your post with all the modifications or tweaks you made to the recipe. Or if it is a recipe from book or magazine, please scan and post the recipe page, but don't write the real recipe. We are not allowing recipes from memories or some friend anymore as this is a "bookmarked" recipe event. Please post your entries with respect to these rules.


Thats' all for now. Take care till next post.

Wednesday, August 17, 2011

Zucchini Mor Kuzhambu - Zuchhini की कढ़ी (Zucchini in yogurt gravy) for Blog Hop


Hello Friends,

Today is the 2nd week of Blog Hop Wednesdays, an effort started by Radhika. It encourages us to blog hop and try our fellow blogger's recipes. Please check out what all this is about.

This week, I was paired with Vardhini. She has such an amazing blog and if you have already read my first entry (Chettinad Aloo Bhujiya - चेत्तीनाद आलू भुजिया (Chettinad Style Potato Fry), here is my second one. I just couldn't stop at one. I had to make this one as well. had posted it only few days ago and the moment I saw it, I knew I had to try it.


It is her wonderful creation Zucchini Mor Kuzhambu - Zuchhini की कढ़ी (Zucchini in yogurt gravy).  For all my North Indian friends, it is a type of kadhi without besan (chickpea flour). If you like yogurt in gravy, you got to try it out and you will not regret, I don't and we all thoroughly enjoyed it. I had it along with Coconut Khichdi (the recipe follows soon) from another blogger friend Deepthi. Didn't I say that these days I am surviving on bookmarked recipes and I am absolutely enjoying it :)


I tried the recipe exactly how she mentioned, so please hop over to her recipe link and check out the recipe with mouth watering pics.

And, what more, my husband actually prepared aloo paratha with this masala for my sons in my absence :)

Please do check what other blog hoppers are cooking.
That's all for now. Take care till next post.

Chettinad Aloo Bhujiya - चेत्तीनाद आलू भुजिया (Chettinad Style Potato Fry) for Blog Hop

Hello Friends,

Today is the 2nd week of Blog Hop Wednesdays, an effort started by Radhika. It encourages us to blog hop and try our fellow blogger's recipes. Please check out what all this is about.

This week, I was paired with Vardhini. She has such an amazing blog. I already got so many of her recipes bookmarked. I actually had one recipe selected for today but then I ran out of ingredients and then she posted this one. Chettinad Aloo Bhujiya - चेत्तीनाद आलू भुजिया (Chettinad Style Potato Fry) caught my attention right away and I had to give it a try. Being a potato lover, we all loved it. 
I tried the recipe exactly how she mentioned, so please hop over to her recipe link and check out the recipe with mouth watering pics.

And, what more, my husband actually prepared aloo paratha with this masala for my sons in my absence :)

Please do check what other blog hoppers are cooking.
That's all for now. Take care till next post.

Tuesday, August 9, 2011

Rava Dosa - रवा दोसा (Semolina Crepes)

Hello Friends,


Here is a wonderful Rava Dosa - रवा दोसा (Semolina Crepes) recipe that I made with the recipe from blog South Indian Home. This is one of my types, as it is instant, quick to bring together and has a crispy texture which my son and hubby love. I have used her recipe as it is, so please follow the link to her recipe and check out the details there.


The only thing I changed here or rather you can say I skipped is adding onions as I was making it for my boy and he doesn't enjoy onion pieces in dosa. We loved the texture, taste and especially the simplicity of it. Please enjoy !!!


This goes to Bookmarked Recipes - Every Tuesday (Volume 53) event of Aipi and Mine.


Thats' all for now. Take care till next post.

Tuesday, July 19, 2011

Plain Dosa (Rice and Lentils Savory Crepes)

Hello friends,


I am sorry that I am not as regular for last few days. I also want to apologize to the blogger friends whom I follow and try to visit them regularly very religiously. But, I haven't been able to do that due to my busy schedule in last couple of days.


Here is a recipe from my mom. You will be surprised when I tell you that this is the first time I made simple dosa batter from scratch at home, except for Quinoa Dosa, I posted a couple of weeks ago. For those of you who think you cannot make the batter without grinder, let me tell you, you can. I have recently boughy Cuisinart Food Processor and it did the job perfectly for me. My son loves these and now I plan to do it more regularly :)


Plain Dosa (Rice and Lentils Savory Crepes)
Ingredients
Idli rice - 3 cups
Urad dal - 1 cup
Methi/Fenugreek - 1 tbsp
Salt to taste
Preparation

  • Rinse and soak rice, dal (add fenugreek to it) for about 4-6 hours (or overnight) separately in plenty of water.
  • After soaking well, grind them separately to a smooth batter (by not pouring a lot of water, but a little will be necessary to grind it).
  • Mix both the batters now in a bowl where it only fills upto 1/2 or 3/4 along with salt. It is important to leave at least 1/4 of the bowl empty as after fermentation, it will increase in volume and you don't want overflowing batter on your counter.
  • Leave the mixed batter for fermentation for upto 8 hours or preferably overnight. I usually soak the rice/dal during afternoon and then grind it before going to sleep, so that next morning it is ready to be used.
  • Once the batter is fermented, (you will get the fermentation smell and it would have risen, so you will know) mix it well. Make sure it is of pouring consistency (little thicker than that of pancake)
  • Heat the iron griddle at high heat. Once you start seeing smoke, sprinkle little water and oil on the griddle (you will get that hissing sound due to water touching the hot griddle, which would mean that your griddle is ready). Traditionally iron griddle is used, but like me if you do not have iron griddle, feel free to use non-stick and then you don't want it to obviously get smoking hot, so take care of that.
  • Pour about 1/4 to 1/2 cup of batter (depending on your griddle size) in the middle of the griddle and spread it using the same cup (if you are using plastic, then take some other spatula) into a circular shape, till it is spread thin. Reduce the heat a little bit (medium-high) and let it cook on each side till golden brown (as you see in the picture).
  • Based on how thin you spread, the texture of dosa will vary. 

Serving
Serve it warm out of griddle, with your favorite chutney, sambar or podi or a combination of all 3.


This goes to Bookmarked Recipes - Every Tuesday (Volume 50) event of Aipi and Mine.
That's all for now. Take care till next post.

Wednesday, June 22, 2011

Mixed Flour Instant Dosa

Hello Friends,


Another Blogging Marathon week. It is BM # 6 and I am doing Regional Specials again and will be posting 7 days of Rajasthani Delicacies. Today is Final Day 7 and here is my regional special for this day.

I was paired up with Kalyani and as she didn't have any Rajasthani Specials, I chose to pick a traditional South Indian Special and here is an amazing recipe of Mixed Flour Instant Dosa.

It caught my eye as it was an instant one and no need to soak, grind or ferment and all that lengthy process. So, without further ado, here is the recipe.

Mixed Flour Instant Dosa
Ingredients
Maida (All Purpose Flour) - 1 cup
Gehun ka Aata (Whole Wheat Flour) - 1 cup
Sooji (Semolina) - 1 cup
Chawal ka Aata (Rice Flour) - 1 cup
Tempering
Red Chili/Green Chili - 2, broken in pieces (for dry red one) or finely chopped (for green one)
Cumin Seeds - 1 tbsp
Mustard Seeds - 1 tbsp
Asafoetida - 1 pinch
Curry Leaves - a few leaves
Oil - 1 tbsp for tempering and more for making dosa
Preparation
  • Mix all dry flours in a big bowl.
  • Add 1 tbsp oil in a non-stick pan (small one) and add all tempering ingredients to it.
  • Once the seeds start spluttering, mix it in the mixed flour.
  • Add enough water and make it into a pouring consistency batter (thinner than pancake).
  • Heat griddle till hot.
  • Brush the griddle with some oil and then pour a big spoonful (1/4 cup or so) and spread in a circular motion till it is thinly spread like a crepe (it won't be as thin as crepe, but in that shape and motion).
  • spray some more oil on the sides and top of it. 
  • Cook till you start seeing the dosa separating from the griddle. 
  • Flip it and cook it on the other side as well till golden brown.
Serving
Serve it with your favorite chutney or podi.

That's all for now. Do check out what other BM bloggers are doing.

LinkWithin

Related Posts with Thumbnails